Pages

Sunday, July 26, 2015

This Year's Theme: HATS!


I have mentioned in past blogs that I am involved with community theater. Last night was our awards dinner, which I attended with my husband. He was nominated for 2 awards, very stiff competition and unfortunately he didn't bring any home. (He did win one last year!)

We still had a great evening out with friends. Anyway the theme (and we always have one) was Ascots and Gavottes. Translation: wear a hat and dance! We were to wear seriously crazy hats, like the women who attend the Ascot Races in England. Here are some photos I pulled off the internet.
 
 One show I worked on this past season was Moonlight and Magnolias. Where I had fun making fake banana peels that I threw all over the stage as the stage manager. Soooo I thought that my hat should reflect that theme, especially since I would be sitting with most of the cast and crew from that production. That should explain the photo at the top of this post.

I thought there might be some of you out there that would like to know how I made it.
Started out with some sketches. Did some research on the internet. Had some foam in the closet, which I used to cut out the moon shape.  Went to the fabric store, not quite sure what material I wanted for the moon until I saw the shiny crepe lamé silver fabric. Picked up buckram for the base and glitter tulle for the netting. Total cost was under $20.
 I traced the foam moon onto the buckram and cut 2 pieces to sandwich the foam. Then I used the buckram moon shape as a pattern for the silver lamé, I added seam allowance as I cut out 2 pieces. I sewed them with right sides together.
 Since the moon is a non-stop curve, I had to do little cuts along the seam allowance to have a smoother look after it was turned right side out. Then I stuffed the foam and buckram into the silver fabric.
Next was the base. I cut out two 5" circles from the buckram, made a slit, and overlapped the ends to turn it into a cap. Covered it with the silver lamé.
The magnolias were provided by my friend, the director of the show. Once everything for the hat was ready, I sewed it all together by hand. Tulle to top of base. Moon to the base. Flowers in front of the moon and more tulle and a big bow on the back.
Last was the headband on the bottom to hold the hat onto my head. I choose a headband that would blend well with my hair.  And there you have it: My Moonlight and Magnolia Hat!!
Oh and of course, being an art teacher I had the most outrageous hat there!

This was actually the third hat that I have made. My husband and I have done some steam punking and I have made hats to match my outfits. Recollections, which is where I bought the outfit below included a fabric swatch that I was able to incorporate into the hat.

With both of the hats, I used a girl-sized straw bonnet from the dollar store as my base.

It's so much fun to get the chance to do something a little different for a change.
And I just LOVE my moon hat! I can't wait for Crazy Hat Day at school!

Thanks for Reading! And share a crazy hat photo if you have one!

Oh and please consider following me either by e-mail or g+ (Google). Thanks!


Sunday, July 19, 2015

AOE Online Summer Conference

 Last Thursday, I spent the day in my nightgown, attending an art conference, online in my sewing/art room. I enjoyed the flexibility and the comfort in which I could do this. I even got an AWESOME swag box in the mail.
The conference was given by the Art of Education (AOE). If you have not heard of this incredible website you need to check it out.  Behind this brilliant idea is Jessica Balsley, an art teacher who realized that there JUST wasn't enough professional development available. Sooooo Jessica created some. What started out as a blog, turned into a site filled with lesson plans, articles, online classes AND the Summer Conference I attended last week. Positively BRILLIANT!

The AOE team, headed by Jessica has attended the NAEA (National Art Educators Association) conferences. This photo was taken of me with Jessica at NOLA (New Orleans, site of the 2015 NAEA conference) this past March.
At the same time they also hosted a gathering for blogging art teachers.  It was a SUPER opportunity to hobnob with the writers of several blogs that I follow. LOTS of FUN!
Not sure how I originally found out about The Art of Ed. I think I was on Google looking for some inspiration for an art lesson. I loved what I saw and signed up for info.

They have been doing two conferences a year and the first one I attended was in the winter of 2014. I felt the connection was spotty and since you receive an after pass, good for 6 months, to view the presentations I decided go back and do that. The 2014 Summer Conference I did at my leisure, with the after pass, as I was out of town at the time. After pass again for the 2015 Winter Conference because I was tied up with something.

Last Thursday I decided to do the 2015 Summer Conference at the time it was being broadcast. AND I'm glad I did! I don't know if it was my new laptop or the AOE upped their resolution but it played out beautifully. And I enjoyed it immensely!
When you initially look at the schedule you think, okay which presentations do I want to see? Then you say to yourself OH NO there are conflicts I WANT TO DO ALL OF THEM!! Well, the GOOD NEWS is that you can view EACH and EVERY ONE of them! The schedule is actually the order in which each presentation is given. They each run about 8-12 minutes and are focused and informative. You also have access to handouts and the opportunity to ask questions and chat with others during the broadcast. AWESOME, right?

It was very relevant to those of us that teach art, as they had presenters from elementary to high school. And you could learn something from everyone.

There were 19 presentations with an after pass that included 5 more. I plan to just highlight a few of them or I'd have a really long post!!!

One that I was really looking forward to was Nic Hahn's Artist Trading Cards or ATC.  Mrs. Hahn has the blog Mini Matisse and this link will take you to a short video on teaching students what QUALITY art is using  ATCs.  I loved it and couldn't wait to see her presentation.
Had fun meeting Mrs. Hahn at NOLA!


Another presentation: How to Teach Restoration at School by Miriam Pateemoster was really, really interesting. (Clicking on her name will bring you to her blog.) I believe teaching restoration is or will be part of our art curriculum. I was fascinated with how much info was presented. And how important restoration is.

There was a presentation on team work with Ian Sands and Melissa Purtee. The part I liked was how to decide on something as a team. Apparently each person is assigned energies or votes. So let's say you have 3 different suggestions to decide on and you get 5 votes. Suggestion 1 may get 2 of your votes, suggestion 2 may get none of your votes and suggestion 3 may get 3 of your votes. Everyone's votes get added up and suggestions get eliminated until you have something the whole team agrees with. Pretty clever!

Julie Davis from Dick Blick (click on their name to link to their videos) always demos a great project and the swag box always contains the goodies to make it. Also met Julie at NOLA. I was a busy girl!

I enjoyed Laura Lohman's presentation on using different strategies to make some crazy/good painted paper. Cassie Stephens presented on School Wide Collaborations-Those ideas just knocked my socks OFF! LOVED them!

There were presentations on classroom management and managing the clutter! Using a kiln and not blowing anything up, using air dry clay because there is NO kiln! (Imagine that?) Making a rubric, getting art out in the community and much, much MORE!! Mind blowing!!!

Cost for this conference???? Early Bird registration got you the conference for $89 and guaranteed you a swag box. After a certain date it was $109 and maybe swag boxes were left. Day of event $125 and no way was there any swag to be had.  There were around 1900 people signed up and 1500ish boxes sent out. And this box was filled with incredible stuff-best one yet!

SOOOO get on their mailing list, learn a bunch of great stuff by reading their articles and checking out their lesson plans AND be READY to sign up for their next conference!!!

Thanks for reading!!

Sunday, July 12, 2015

The Mask Challenge


Keeping busy over summer break is pretty easy. There are SO may things I put off during the school year in anticipation of having time over the summer. Don't laugh-stuff IS getting DONE!

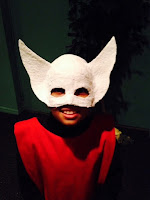
It is also fun to be challenged once in a while. And I gotta say I was feeling challenged when I received a message from one of my theater buddies. Myndee asked me to create masks, to match her costumes, for the 3 Cheshire Cats in the production of Dorothy in Wonderland. The world of The  Wizard of Oz collides with that of Alice in Wonderland.
 My inspiration-
Now it is quite obvious that Myndee reads my blog and saw my post on my 5th graders making masks. However, we lean more towards the decorative side with those. I stress with my students that the masks will be going up on a wall.  Sooooooo the challenge was how are these masks gonna stay on and be safe for the children to see out of them?

I noticed in the inspiration photo how the mask covers the top and sides of the head. Okay, so I covered the top and sides of the children's heads with Plast'rcraft, leaving the eye spaces open and covering only the top part of their faces. (Before starting I covered their heads and the top portion of their faces with plastic shopping bags.)
After they dried, I made the eye holes bigger using a small utility knife and scissors. I didn't like how rough it made the edges so I cut up tiny pieces of the Plast'rcraft and covered over those spots.
Cats have ears, I cut them out of poster board after making a pattern on paper.
Can you see the slits on the ears? I bent the edges to attach them to the mask with hot glue.
Then I covered the back of the ears first, let them dry and then did the front of the ears. I actually decided to use the ear pattern to cut out the Plast'rcraft so the ears would look neater.
Then I went back to the theater to make sure the masks fit and the eye holes were big enough. Oh AND to figure out whether or not the masks would stay on the their heads or if we needed a Plan B. 
Looking good! One girl was out, but I figured 2 out of 3 worked, so I could continue with them.

Let the painting begin!

Next the fur! Made with feather boas.
 
Masks are finished and totally lives up to the awesomeness of the costume!
Here is the cast photo showcasing all of Myndee's costumes. I know they had tons of help from parents doing the flats (the big background paintings) and other scenery. And of cause the director Miranda, who got all those children up there performing!
I am looking forward to the show this afternoon!

Have you had any artistic challenges this summer? Tell me about it, leave a comment!

Thanks for reading!!


Friday, July 10, 2015

Summer Institute on Contemporary Art

Summer Institute on Contemporary Art at Penn State or SICA was educational, motivating and full of fun. It was fun meeting people and I LOVE visiting museums. SICA took place on the campus of Penn State University in the Palmer Museum of Art and in the Patterson Building across the street.
 (The paw is a close up from the front stairs into the building.)
Summer Bargain!! The Institute was FREE! It lasted 4 1/2 days. They provided FREE breakfast AND lunch every DAY! And people coming from out of town, like myself, could apply for a lodging grant of up to $400! Thank you Andrew Schulz!


All I paid for was the airfare and a few dinners! Oh and $10 towards my lodging. WOW!
It was a very hectic week filled with articles to read- ONE night we had 50 PAGES to read!!

It was like being back in college taking a class! (Actually a few people were enrolled for credit.)

It was incredibly sophisticated and intellectually stimulating. I spend way to much time with little ones and really enjoyed donning my thinking cap! A BIG THANK YOU to the facilitators of the program, Dana Carlisle Kletchka and Booker Stephen Carpenter II.

And yes, there is a story behind Dr. Carpenter's staff picture of him drinking from a water fountain!

We were given canvas bags that we got to silk screen with the SICA logo and then decorate. Thank you Sue Uhlig!

We did meaningful activities in the galleries which I wrote about here  here AND here.

We also viewed a gallery with the following pieces of art.

 Compelled by Jules Olitski,  acrylic on canvas. Yes, this was very large!
 Untitled by Cleve Gray,  mixed media.
 Princeton by Esteban Vicente,  oil on canvas.
 The Rabbitt by Hans Hofmann,  oil on canvas. This was the smallest.

We were asked why did we think they were grouped together?  What united them? (Please leave a comment below as to what you think!) There was an interesting discussion that followed. Thinking about that will be very helpful the next time I do my postcard activity. In that activity students curated their own exhibit and explained it to me. I will now extend that activity so that students can hold similar discussions about each others choices.

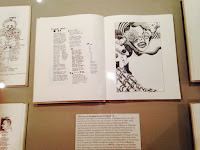
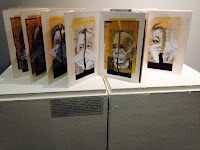
We also attended an exhibit of visual journals displayed in the library. The journals belong to a retired professor, Brent Wilson, and span over 40 years and many different countries. Just fascinating-AND we actually got to skype with him one afternoon! I really need to have my students connecting with journals! The insights gained are endless..........

This was, overall, a wonderful opportunity for professional development! 

I would love to know what those of you reading this do over the summer to inspire the upcoming school year.  And since this was all about Contemporary Art I thought I would share this post with all of you from Art is Basic it is a round-up of elementary bloggers teaching about contemporary artists. (Includes one I did on Romere Britto.)

Thanks for reading!