Pages

Showing posts with label costumes. Show all posts

Sunday, May 22, 2016

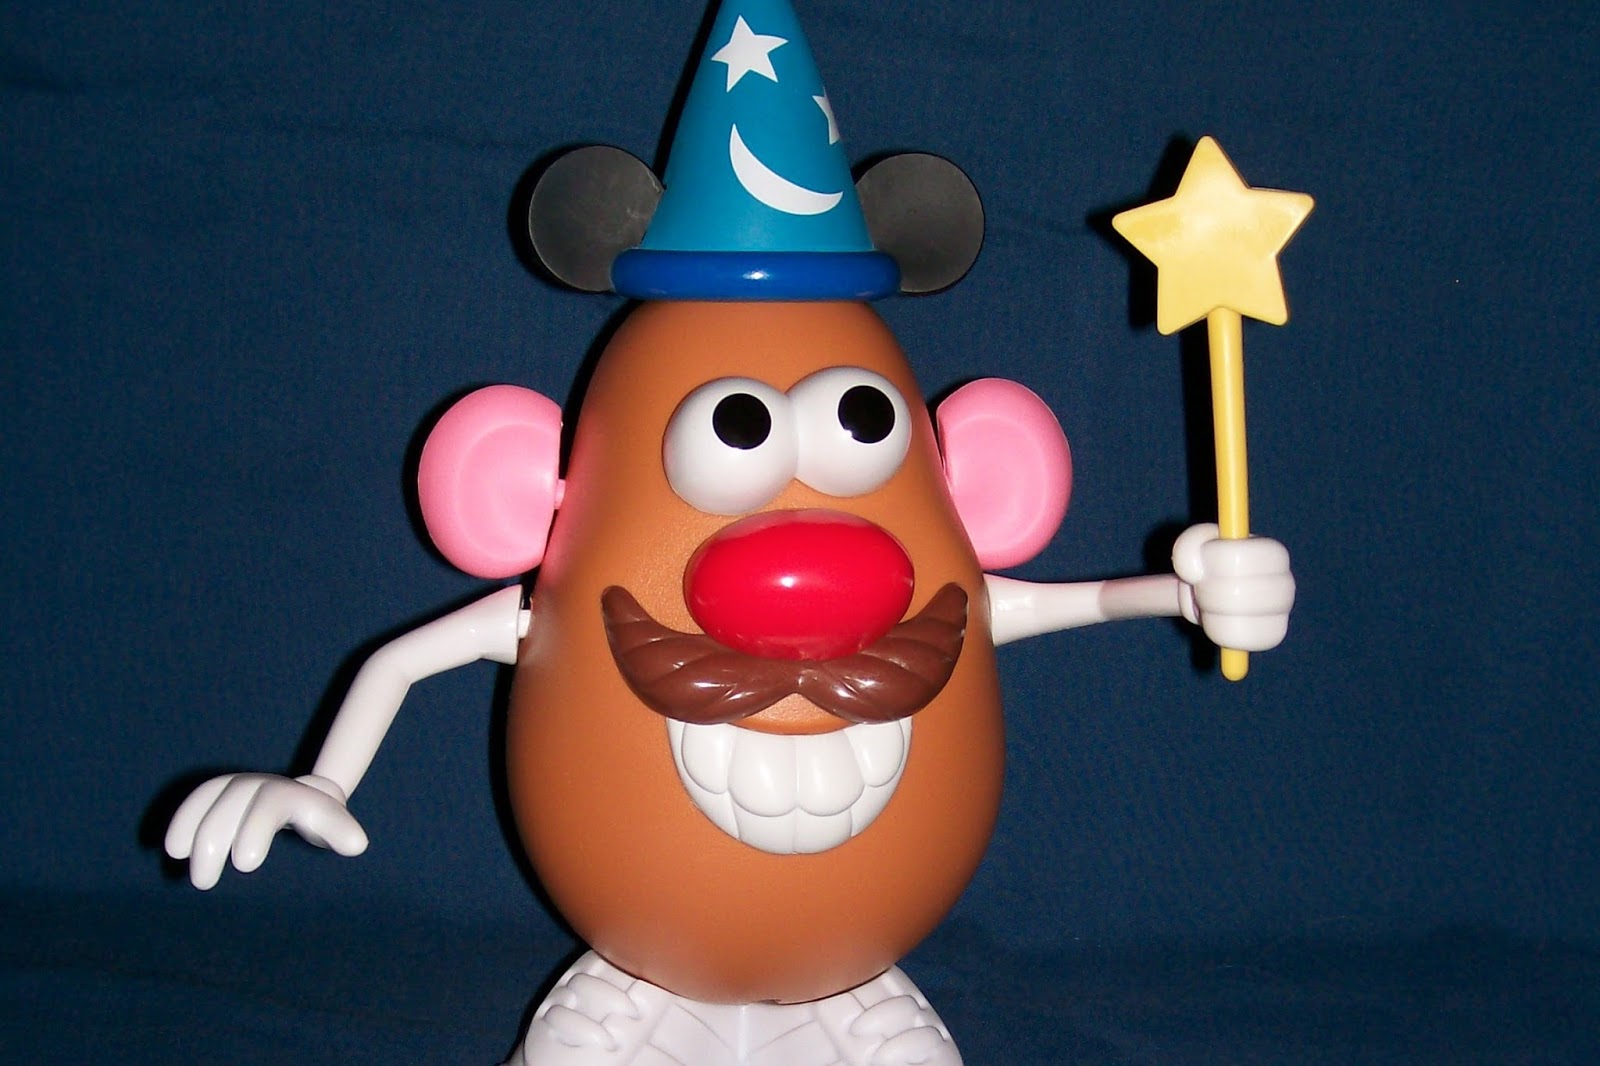
Potato Head Fun!


Gotta start out by telling all of you that it was hard to decide which picture should go on top! So I used an app called PhotoGrid to make the collage above.

Read on to see the fun that I have had with Mr. and Mrs. Potato Head!

For some reason that I just can't explain I love Mr. and Mrs. Potato Head. I love the creativity that has gone into making them into a variety of characters. Just do a Google search and you will find they have been turned into Star Wars & Wizard of Oz figures, superheros, rock stars like Kiss & Elvis, and so on.

In all started back in 2004 when I went into Orlando with my sister and we went shopping in downtown Disney. They have a store there where you can fill up a box with a potato head and all necessary parts to make different Disney characters. I ended up going back with my BFF.

And I have conveniently forgotten how many times I filled up one of those boxes. Most of my grandchildren at one time or another have played with them. Although, there are some in boxes that are off limits like Indiana Jones and Sponge Bob.

Anyway, so when us art teachers teach our students we tend to incorporate things that we love into our lessons. And that is what I did when I taught a lesson on mixing the color brown.

I tell students that to make a primary color we would need to get it from nature. Well I happened upon some red dirt which they added green paint (its complementary color) to make the color brown.

There were tracers for the potato and some of it's featured parts. Yes, I occasionally use tracers with my students. It is no different then using a pattern to sew with.


 I think they came out great!

Now you may be wondering about the photos in the collage above. At some point when I realized the Potatoes Heads turned 60, I had a party for them. Turns out it was the same year my husband turned 60 so I already had the signs available.
Now these photos-
Were from a photo shoot with my new digital camera 10 years ago. The photos above were as they waited in line for their turn.  Harmless fun........

Above just a few, as I took so many photos that day, my batteries died.

Then two years ago I needed a costume for school (favorite character) and I just had to make this.
I made the pattern by laying out a dress and doing the body shape around one side of it. When I do things like this I tend to fold everything in half to get it symmetrical. It is made out of felt so I wouldn't have rough edges. And in order for the ears to stay up I have cardboard tucked in behind it. I made it in under 3 hours so the face features do not come off, maybe if I thought about it I would have used velcro so I could have made it interactive. Glued flowers onto a visor added the shirt, gloves and legging and it was perfect! Students totally enjoyed it!

There you have it Potato Head Fun! I think the next time, maybe, I'll do a drawing lesson and bring in my Potatoes to model........ maybe. There are some things that are just to hard to share.

What is something you love that you shared with your students??

Thanks for reading!!


Sunday, November 1, 2015

T'was the Week Before Halloween

This past week I didn't really want to start anything new, AND I wanted to get all my classes aligned. You know- all of the same grade levels working on ALL the same lessons. AND I knew my students would want to have a little fun for Halloween. (They should have fun every week except.... NOW we have EOC's.)   Below you will see what my students were up to last week.

My 4th and 5th graders learned how to make pop-up cards! A really BIG SHOUT OUT to Matthew Reinhart, (Google him) a paper engineer and author of MANY incredible Pop-Up books. I was extremely fortunate to take a workshop with him at my state conference.
Basic directions for this card are as follows. Fold paper in half, like a book. On the folded edge or crease draw 2 lines as shown in the first photo. Cut the lines.
 Then fold the cut section up, flip over and fold again, you are intentionally breaking the fibers on the paper. Then open the card and push the cut section through to the inside to create the pop-up.
Now because I really wanted this to take only one session I used this amazing gizmo in the teacher's workroom to have pre-cut shapes available for my students to use. They used double stick tape to attach their shape to the pop-up and used another paper larger than the first sheet for the outside of their card, which they also attached with the double stick tape.

And just look at how creative they were!

Some students chose to make their own shape for inside their card.
I knew this was a very successful lesson, however the real joy I got from this was when a student brought me in one that he made, on his own, at home.  Oh YEAH!
My 3rd graders are all working on a positive/negative value painting-which I will share in a future post.

My 2nd graders did pumpkin weaving. Really quick and simple. They traced a pumpkin shape, folded it in the middle (I pointed out to them that it was NOT symmetrical as one side of the pumpkin was higher than the other.) After folding the paper, they drew lines as shown in the second photo. They cut on those lines and then they were ready to weave.


Kindergarten and first graders had the opportunity to do bats, inspired by the book Stellaluna. Turns out that book is part of the first grade reading series so I gave students a choice.

Since Halloween and costumes were on everyone's mind, I had students draw costumes on their bats.


I made bat tracers that I cut in half to be able to teach my students a little about symmetry and following directions. 1-Fold paper in half.  2-Place the straight edge on the fold (line of symmetry). 3-Trace around the outside of the body with a pencil (DON'T trace the straight edge). 4-Cut out, open and decorate.  I do caution students to let me check their papers before cutting. Overall it went well.

Of course on Friday we had a storybook parade and here's my costume. Turns out I had a few crayons that quit or fell out of my box. I had NO idea what the kindergarten team had planned!
(By the way-I made my crown using crayon picks from cupcakes that my daughter saved me. I hot glued them to a plastic headband after breaking off the pointy part.) Thinking of wearing the crown on a daily basis-just call me the Queen of Crayons or Miss Crayon........ I'm thinking I had too much sugar.........

From what I have seen on Facebook this past week there have been many wonderful costumes used by teachers to inspire and have fun with their students. Way to go! I know I costumed up to see all my student's happy faces!!

With so many wonderful blogs out there-THANKS for reading mine!


Sunday, July 12, 2015

The Mask Challenge


Keeping busy over summer break is pretty easy. There are SO may things I put off during the school year in anticipation of having time over the summer. Don't laugh-stuff IS getting DONE!

It is also fun to be challenged once in a while. And I gotta say I was feeling challenged when I received a message from one of my theater buddies. Myndee asked me to create masks, to match her costumes, for the 3 Cheshire Cats in the production of Dorothy in Wonderland. The world of The  Wizard of Oz collides with that of Alice in Wonderland.
 My inspiration-
Now it is quite obvious that Myndee reads my blog and saw my post on my 5th graders making masks. However, we lean more towards the decorative side with those. I stress with my students that the masks will be going up on a wall.  Sooooooo the challenge was how are these masks gonna stay on and be safe for the children to see out of them?

I noticed in the inspiration photo how the mask covers the top and sides of the head. Okay, so I covered the top and sides of the children's heads with Plast'rcraft, leaving the eye spaces open and covering only the top part of their faces. (Before starting I covered their heads and the top portion of their faces with plastic shopping bags.)
After they dried, I made the eye holes bigger using a small utility knife and scissors. I didn't like how rough it made the edges so I cut up tiny pieces of the Plast'rcraft and covered over those spots.
Cats have ears, I cut them out of poster board after making a pattern on paper.
Can you see the slits on the ears? I bent the edges to attach them to the mask with hot glue.
Then I covered the back of the ears first, let them dry and then did the front of the ears. I actually decided to use the ear pattern to cut out the Plast'rcraft so the ears would look neater.
Then I went back to the theater to make sure the masks fit and the eye holes were big enough. Oh AND to figure out whether or not the masks would stay on the their heads or if we needed a Plan B. 
Looking good! One girl was out, but I figured 2 out of 3 worked, so I could continue with them.

Let the painting begin!

Next the fur! Made with feather boas.
 
Masks are finished and totally lives up to the awesomeness of the costume!
Here is the cast photo showcasing all of Myndee's costumes. I know they had tons of help from parents doing the flats (the big background paintings) and other scenery. And of cause the director Miranda, who got all those children up there performing!
I am looking forward to the show this afternoon!

Have you had any artistic challenges this summer? Tell me about it, leave a comment!

Thanks for reading!!