Pages

Sunday, December 20, 2015

Happy Trees!

The last two weeks before the "Winter Break" aka Christmas Vacation were spent making happy trees with my students in 2nd-5th grade. I know many teachers out there don't want to get into the whole holiday scene and many of you are not even allowed to. However, we embrace it at my school. We have a Santa who brings hats, scarves and mittens to our students in k-2nd grade. Which are provided by a local community of retired adults who have adopted our school.  And a Santa who comes to have hot chocolate and cookies with the children. 

Since my 4th and 5th graders were already experienced at making pop up cards which you can read about in this post.  I thought we would do these Christmas trees which I found here by Robert Sabuda.

 Print out the pattern on card stock. Score the broken lines (I used a pointed stick).

 Fold on the middle line. Cut on the heavy solid line.

And then pop through to the other side.


Decorate inside. Use double stick tape to attach to the outside of the card, which should also be card stock.

Use some interesting lettering to decorate the outside of the card. Ways to connect this to the curriculum: designing greeting cards as a career, learning about different fonts and typography, using paper to create 3D art, and developing self expression.

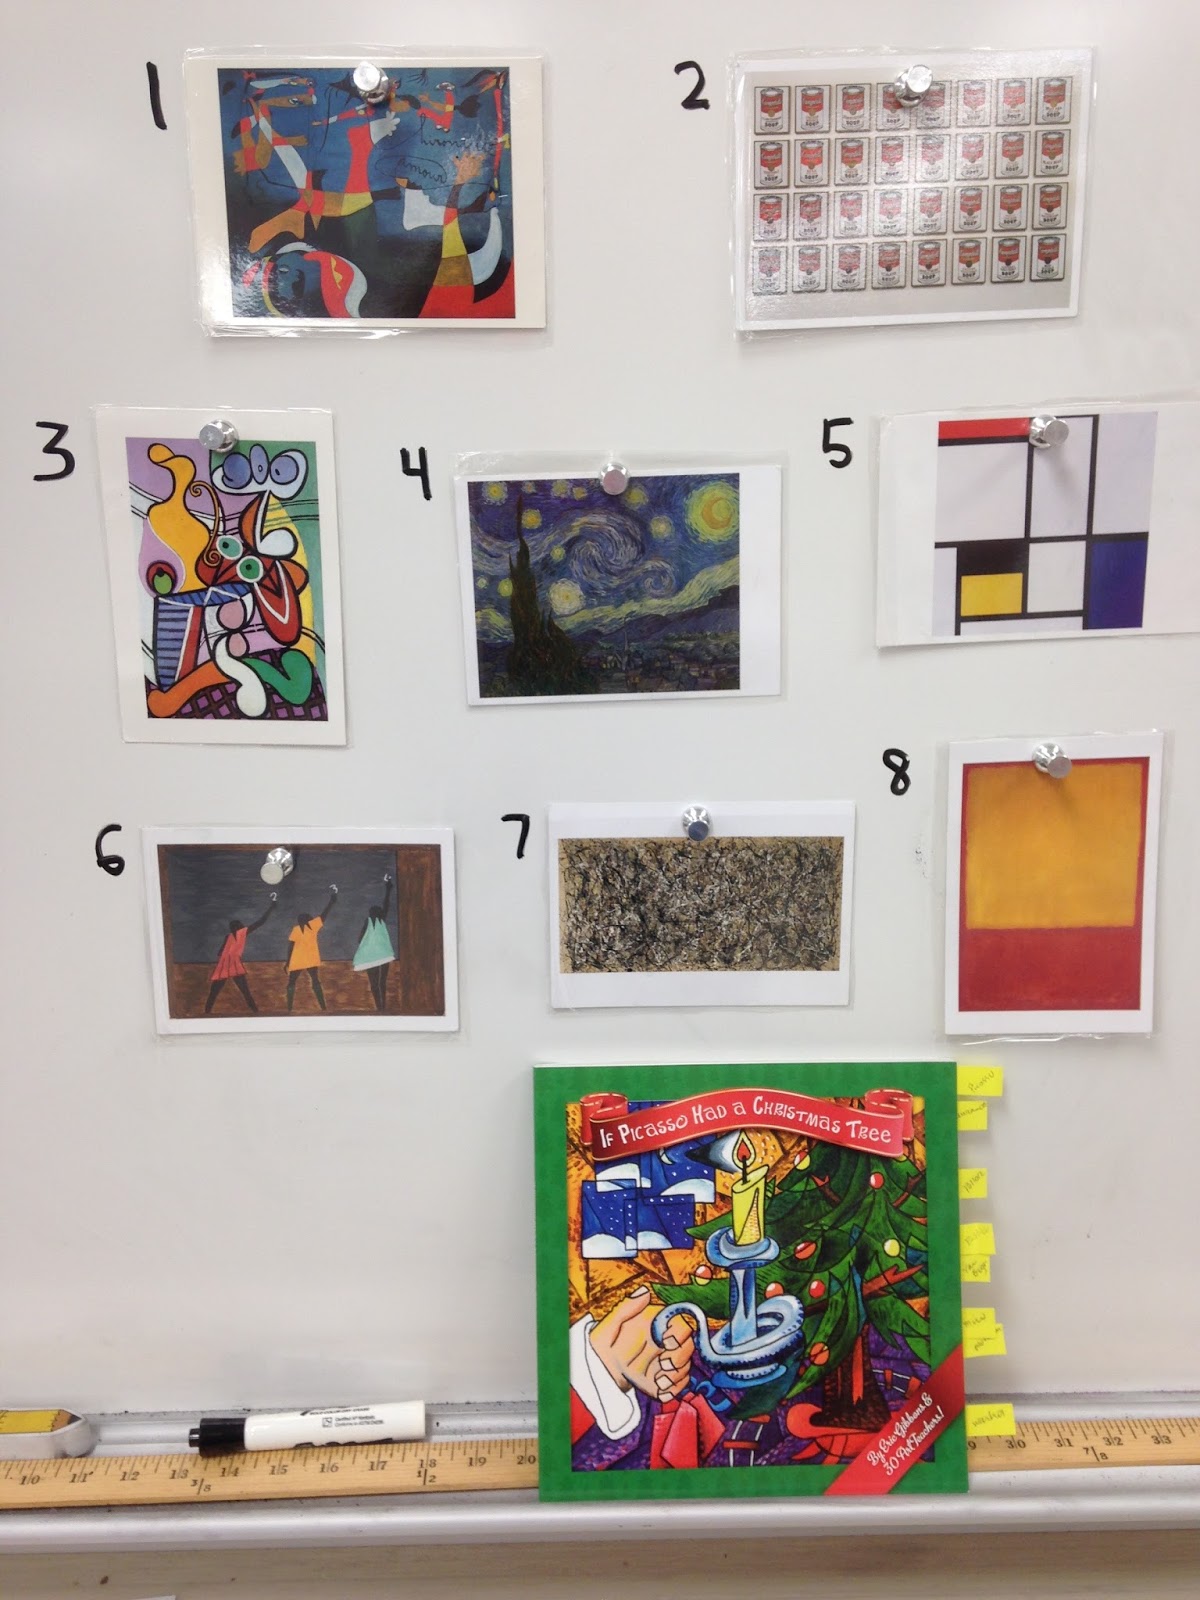
My 2nd and 3rd graders also did trees and I used the book: If Picasso Had a Christmas Tree  in the photo below to inspire them.
The book has trees created in the style of a wide variety of artists done by art teachers. I put postcards up on the board of artwork done by the actual artists that were emulated in the book. Children were to match the trees in the book to the postcards on the board. It was a blast! It always amazes me when I try this type of activity and the students have so much fun.

To tie this into the curriculum we reviewed lines and patterns and then 2nd graders were taught about warm and cool colors.


3rd graders were taught about complementary colors.

And for any early finishers I had this amusing Roll a Snowman sheet for them that I found here.
 I had some dice on hand from when I had a sub do this Lego activity.

Below are a couple of cute snowman made by my little ones.

What were all of you doing last week with your students? I would love to hear about it!

 Have a wonderful holiday break and thanks for reading!!


Sunday, December 13, 2015

Symmetry

According to the curriculum guide I am attempting to follow, 2nd and 4th graders are required to learn symmetry. What really excited me with this lesson was I got to incorporate the iPads I received from a grant that I wrote. Click here for details.

I started the lesson with my students on the carpet and introduced the app Kaleido Free. There are different options for making art with lines of symmetry, from one line to 4 lines. My plan was to do kaleidoscope art with 2 lines of symmetry for 2nd grade and 4 lines with 4th grade.


I also let them look through actual kaleidoscopes that I bought years ago at Oriental Trading.

Before we started our project I wanted students to understand the basics of tracing and transferring their designs so I used these coloring sheets from Art for Kids to scaffold.
They taped tracing paper (which they were very excited to be able to see through) over the insect, traced it and then flipped over the tracing paper and transferred the lines to the other half of the paper.

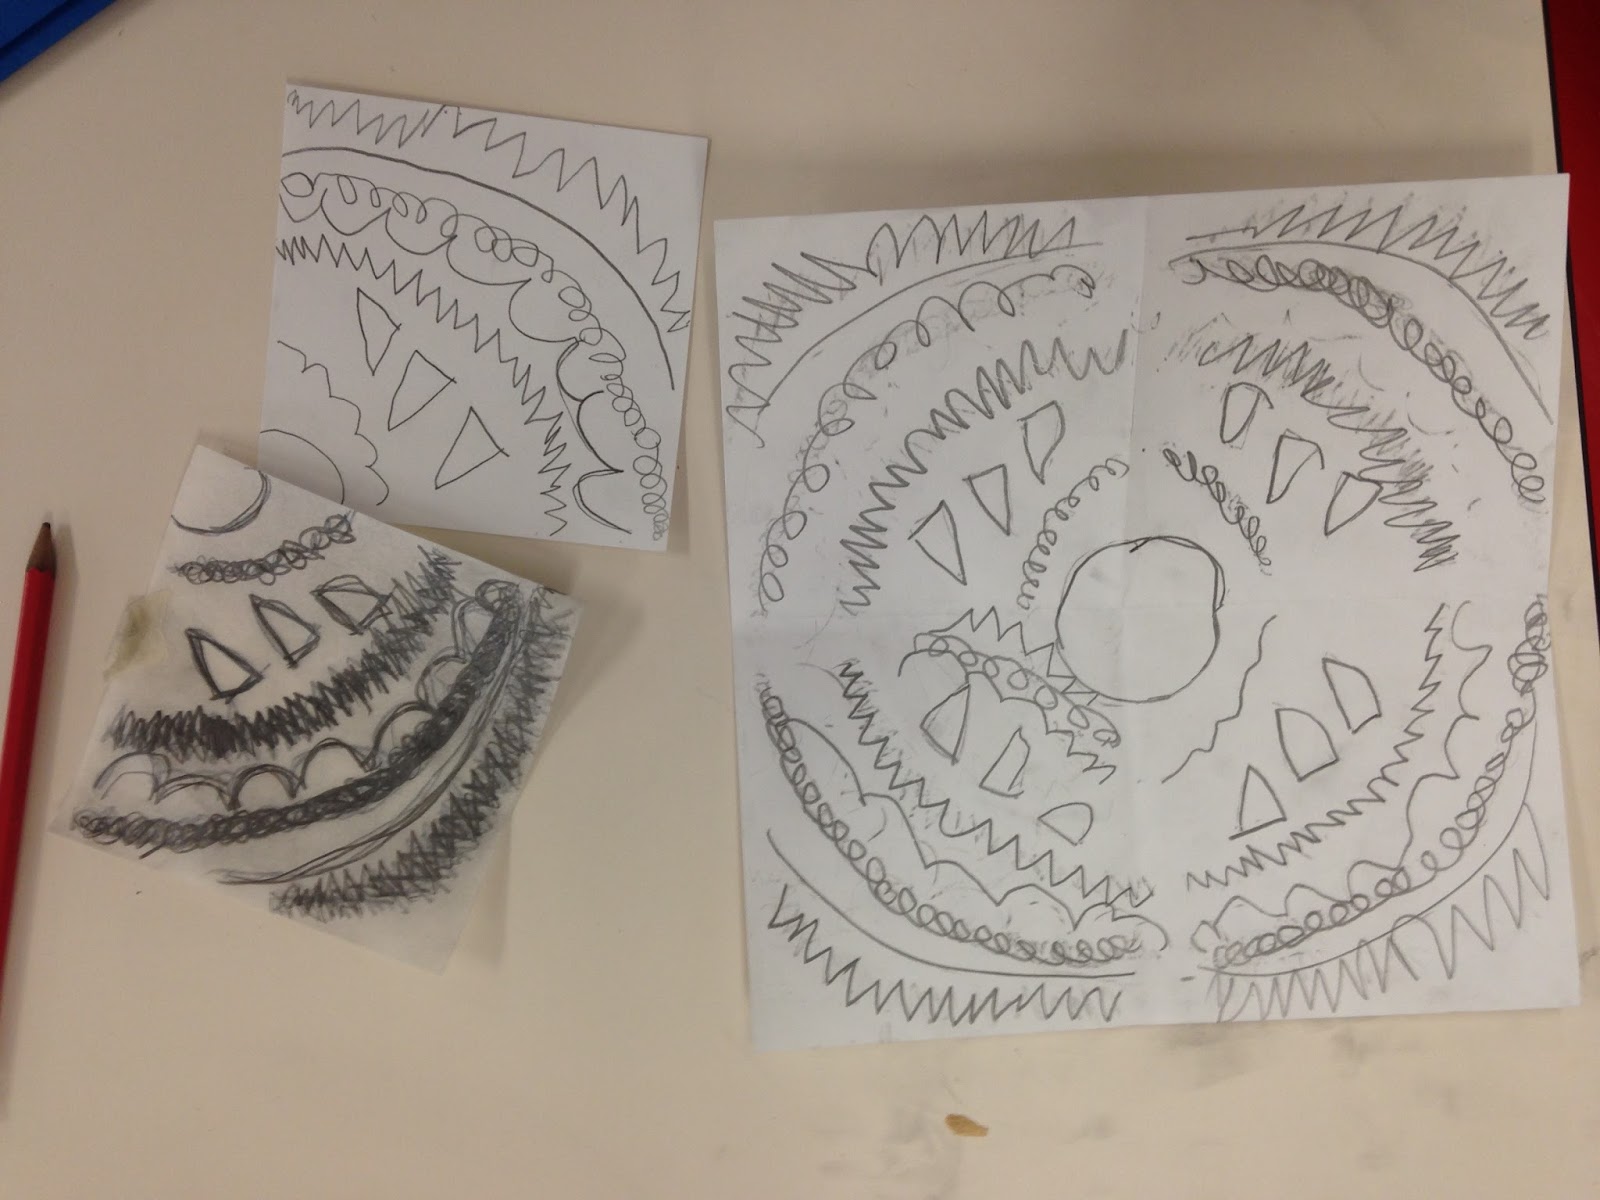
For 2nd grade each student received the following: a 4 1/2" square piece of tracing paper a 4 1/2" square and a 9" square of white drawing paper.
They made their design on the 4 1/2" square paper, traced over the design with the tracing paper and then transferred it to the 9" square 4 times. Basically- draw design, trace design, flip over design (so that the pencil marks made are facing down on the paper) and retrace. Continue to flip and trace around the paper. Students painted to complete their kaleidoscopes.


As I did this project with students a few things occurred to me. Some of them were having trouble understanding the concept, some did very complicated designs which were taking a long time AND suddenly I didn't want all the art from all the groups to be the same. So I changed out the lesson for a few classes. I even managed to eliminate a step. Students folded their paper in half, did the design on one side. Then they traced it, flipped it and transferred it to the other side.

My 2nd graders did suns inspired by this book by Denise Logan.


And my 4th graders did African masks from this book, also by Denise Logan.
I have done many of the lessons from both books, they are well worth the money.


My 4th graders still need to finish because I just had to throw in a fun Christmas activity. I will share that in another post!

That's all for now, thanks for reading!!


Sunday, December 6, 2015

"Selfie" Portraits

Back in October we had Red Ribbon Week. This is a week where the guidance counselor talks to the students about the dangers of using drugs. I support this endeavor by having my kindergarten, 1st and 2nd graders make posters. Red Ribbon Week is celebrated nationwide and there are catalogs in which ribbons can be purchased for students to wear. Choices can be made as to what slogan to put on the ribbons. Our guidance counselor chose "I ❤️ My Drug Free Selfie."

This was perfect as my curriculum has a unit on self portraits. With k & 1st I read the story below. We talked about and practiced different faces we might make according to our mood or how we were feeling at that moment. I briefly talked about how bad drugs were, leaving most of that lesson for the guidance counselor to do.  We talked about "selfies" and I demonstrated what they were by using my cell phone.
 I thought having students do their self portrait inside a cell phone frame would work out really well. When I get these "brilliant" ideas I usually Google free coloring pages and the item. That is how I got the cell phone frame. Then I photocopied it onto card stock. Students made their "selfies" and cut them out for display. Click here for details on how I teach self portraits.


With my 2nd graders I wanted them to have more of a challenge. In addition to self portraits the curriculum includes communication with the community. My interpretation is for students to make posters.  I also wanted them to learn about making bubble letters. 

Below are rubrics for making a poster.
Also some examples of the right and wrong way to make a poster.
 
When I teach bubble letters I start out by lightly drawing the letters for the word and leaving some space between each letter. I call this the bones of the letter. Next we need to put some skin or  a bubble over the letter and then erase the bones. Since we don't see our bones through our skin.


Again I had the students use a cell phone frame, it was smaller, leaving room for the slogan.


They were displayed on one of MY NEW Screenplex display boards.


Students were excited to see their work hanging up in the main hallway. 
What are some of the slogans you have used for Red Ribbon Week?

Thanks for reading!