Pages

Sunday, September 13, 2015

Painting and Learning About Lines

 Art Is....... a wonderful way to introduce the Elements of Art to children. That is why I read the book to my kindergarten students. After reading the book we went over the different styles/kinds of lines and the directions a line might go in. Then I passed out sketchbooks for students to draw the lines they learned.
 When their note taking was done students went to their seats to draw lines with a black crayon, creating patterns with their new knowledge.
Since the beginning of the school year is all about establishing routines, I decided we would paint our beautiful lines. Thereby giving me the opportunity to teach them the procedures for painting.
The first photo is how the trays were set up to distribute to students. I demonstrated how to wipe off extra water from the paint brush, by using the side of the water container. WE DO NOT TAP OUR PAINT BRUSHES ON THE EDGE OF OUR WATER CONTAINERS! EVER! Students could also use the sponge to wipe brushes.
I demonstrated how to hold the paintbrush and how to lift the paint up from the paint tray. I also informed my lovely students to CLEAN paint brushes between colors! AND how to clean off the top of the paint if someone forgot and got the paint dirty. 

AND apparently I forgot I was dealing with really young children and should have been watching them a little more closely!  As you can see from my before and after pictures above. Sigh.........


 Part of the routine is for students to put away their paint tray and place their painting on the drying rack.
Art work is placed on the drying rack starting at the bottom shelve and working our way up to the top. I separate classes with a tray or mat board. At the top of the drying rack is the class box with their classroom teacher's name on it.

Oh and after we cleaned up and students were on line I used my arms to show the directions a line might go in, children followed my arm movements and repeated after me for each way I moved my arms.

To extend our learning about lines and to teach students how to use Play Doh in the art room I made these practice sheets after seeing them on this site. Ms. Gruendler looks like she has fun teaching her students about lines. This is my grandson practicing for next week's lesson.

He apparently went home and even though he had a packet of homework to do this week from his teacher, he told my daughter he needed to practice his lines for art.


Here are some finished paisleys from last week's lines and patterns with my 1st and 2nd graders.

AND I finally got the results of my E.O.C.'s from June. Yes, MY results. Yes, students took the exams. BUT, aren't I the one being tested? This IS a discussion for another day.........
I gotta say I'm feeling pretty pleased with the results.  Especially since the test came from district. And it was the first time my students were tested in art.

Please comment below whether or not you test your students and what your thoughts are.

Thanks for reading and please consider following me! 


Sunday, September 6, 2015

Paisleys Are Perfect

 Found this awesome book at a new store in the neighborhood  5 and Below, it cost me $5 and I knew it would inspire many lessons. The first of which was the page on drawing paisleys.
I did this lesson with my 1st and 2nd graders. I did a quick review with my students on different lines, the direction a line might go in and how to use lines to create patterns.  I have noticed in the past that many of my students don't have the vocabulary words for the different patterns found on clothing. They also don't understand when I refer to something as being a solid color. I felt this lesson would be a wonderful time to introduce some of those words.  The fabric samples below either came from my stash or were purchased at JoAnne's Fabric. Students enjoyed learning about fabric and textiles and I got to teach them a bunch of NEW words!!
 Many of the older students saw this on the board and want to know when they would be doing this.  I just might pull this together and leave it for a sub to do with them.
 I photocopied the page on the right from the book to use as inspiration. Students did have tracers for the shape of the paisleys. They had a small, medium and large paisley shapes they could use. The paisleys need to float on the paper not overlap and placement was their choice.


 When they finish drawing them, they started to outline them with black Sharpies. Next time they will use watercolors to paint their paisleys.
Thought I was reaching a little on this lesson. However, they did an awesome job considering how young they are. 

Had PLC training on Tuesday. It was overwhelming and a bit confusing. Basically Art along with Music and P.E. are considered Interdisciplinary PLCs and we can collaborate on standards and common assessments to create a goal. Not worthy of a full blog post. Totally not the fun part of teaching!

Would love to know what lessons you teach for patterns!

Thanks for reading!!
And if you teach in Florida and are planning to attend the conference next month I will be doing a workshop on using museum activities in your art room titled Look! Listen! And Learn! And a presentation on blogging titled Born to Blog. Hope to meet you there!


Sunday, August 30, 2015

Substitute Angst

I have been a substitute teacher. Memories of those days still have me cringing. Doors were closed in my face. Students made fun of me. And bad behavior was always at an all time high. Students dancing on tables required me to get help from the teacher across the hall. I NEVER subbed in middle school after that day.

OH and let's not forget the directions to get the textbooks out of the cabinet, that was LOCKED and there was NO key. OH AND trying to figure out the gizmos to show a movie, back in the '90's. It was a nightmare....... It got to the point where I made sure I had with me a variety of easy lessons that I could do with students.

It is with having had those experiences that I plan lessons for my substitutes. The advantage of being an elementary art teacher who sees students once a week, is that the same sub plans will last for 5 days. So the plans I am writing for Tuesday I can use in October when I am out for the FAEA conference on a Thursday and Friday. AND I will still have a Monday and Wednesday to use those lessons.

For my primary students I like to leave a book for the sub to read which can jump off to an open ended drawing/coloring experience.
The book above is still available on Amazon. Is about a cat trying to find inspiration for his next painting. The illustrations are very bright and beautiful. Many discussions about what the students are looking at, feeling or how they get inspiration can be had during the reading of this book. Afterwards students are given paper and crayons or markers to make some art.

Another book I've used is Sylvie. Sylvie is tired of eating the same thing everyday and decides to try new foods, which turns her into different colors. I put together step by step directions for drawing a flamingo for the students to follow. And then they decide what she has had to eat and color her accordingly.
Also, this book where all the neighbors decide to make their house "The home of their dreams". Students can then make their own dream house.
  

I will be out on Tuesday to be trained as the PLC facilitator for the singletons on campus. In other words the liaison/team leader for Music, P.E. and Art. Should be interesting, perhaps a future post?

I decided to leave plans for the sub to read the book Matthew's Dream. It is about a mouse who wants to be an artist. I think it will be perfect for the beginning of the school year because of all the colors and shapes used in the artwork. You know connecting to the Elements of Art.

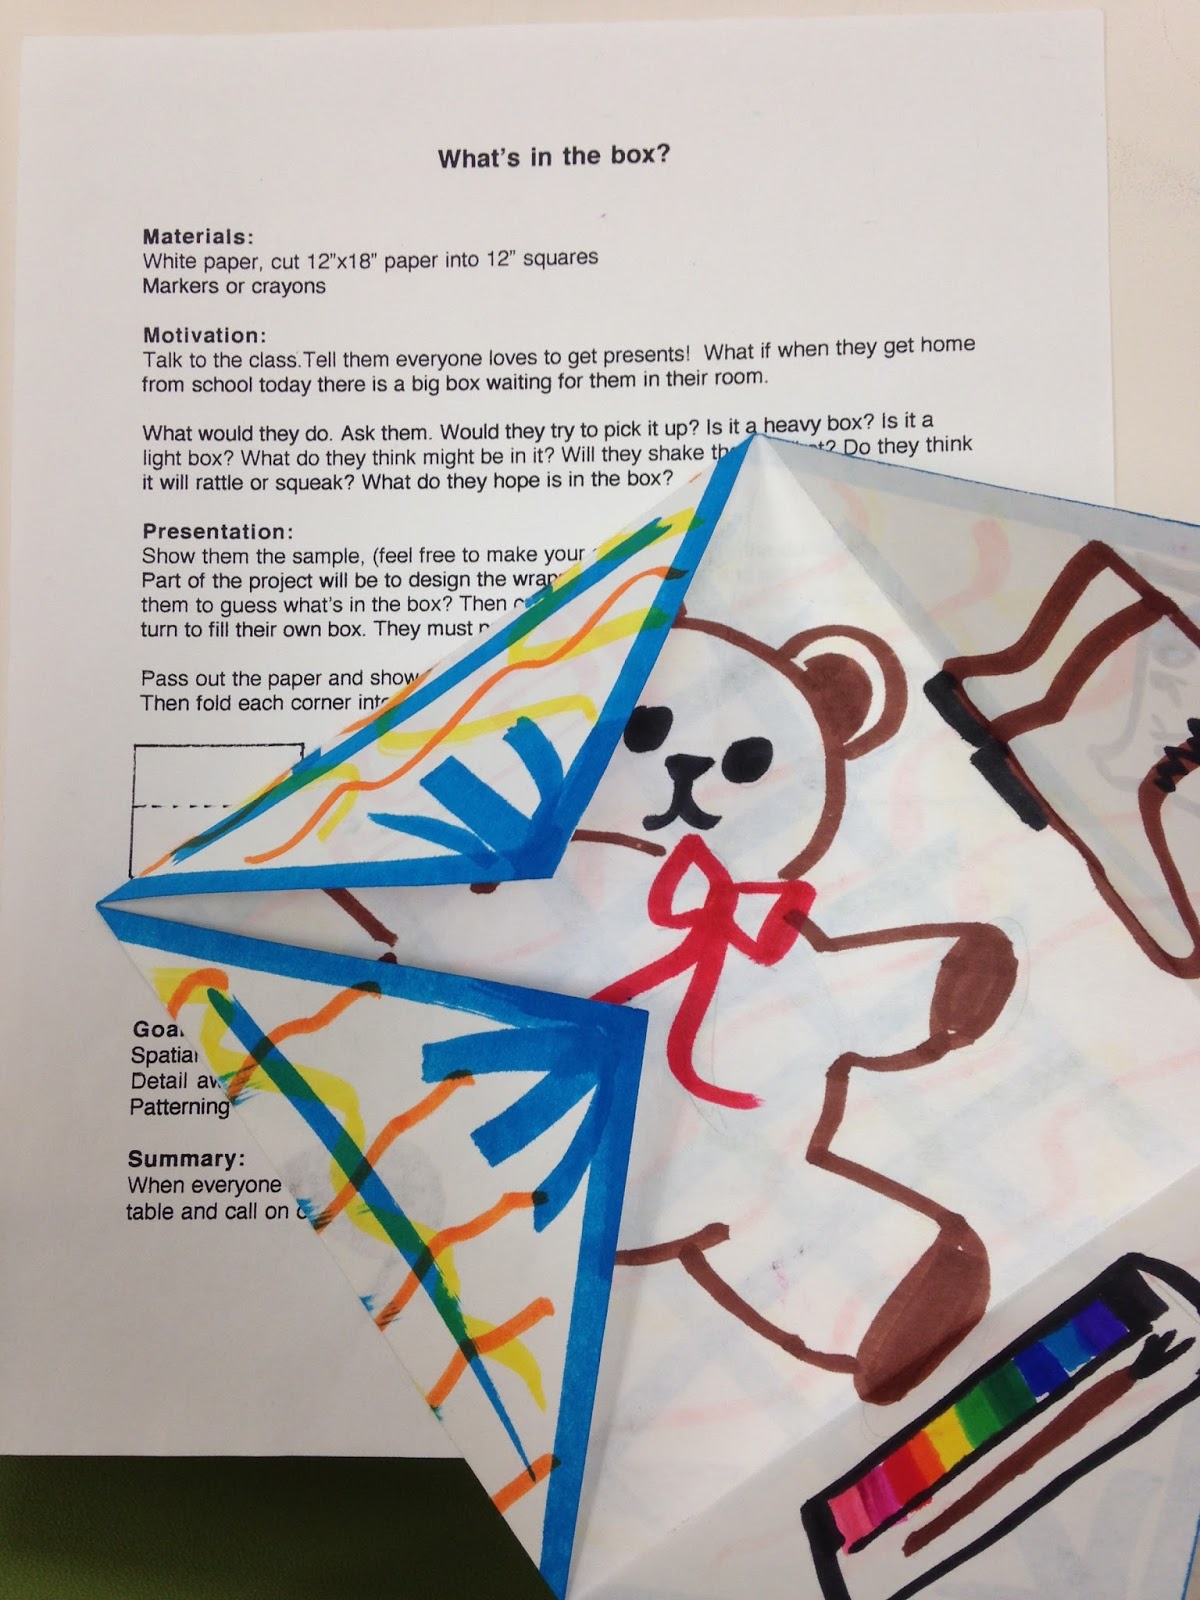
Now, while the books work for the k to 2nd grade set. It won't cut it for the older kids. Some of those projects need to be more of a follow the steps type of deal. What's in the Box? (Check out the resource page for a photo of the directions.)  Is fun, students draw things inside and then can decorate the outside (back of the paper) as if it was wrapping paper.
 Making up or using a ready made glyph works really well.
I have had these plans for so long that I have no idea where they came from. Or if I made them up? I also like to leave a copy of Shel Silverstein's poem "What's in the Sack?" Students can then draw a sack and fill it up with anything they want. Or fold their paper, book style, draw a sack on the front. Then draw a special item inside. AND to add a writing component have students write clues as to what's inside. They can then partner up and share.

There are many wonderful resources just a few clicks away! Gotta show you all what I found to leave for my older students. A Lego Person! Check out the link to download your copy.

Not sure how rolling a die will work with this, I really think students will want to draw the Lego person their own way. However, this will fit in nicely with  the self portraits we are working on.

Being in a new room and doing a few things a little differently then before I have had to write up new directions for the sub as to how to manage the classes. It will include where to find things, who to contact for help, seating charts, schedule and how to use Mona Lisa to get student's attention. Which by the way worked really well last week. With the exception of one class where a student called out "There is NO Mona in this class!" With a little more practice..........
It's really great when I find a person who follows my plans and everyone is happy. It doesn't always work out that way. It was a nightmare last November when I took a week off for my son's surgery. He is fine and when I returned I certainly felt appreciated.

I learned from my subbing experience to make sure my plans are written clearly, I use images if possible. I over plan for students to have options if they finish early. And I try really hard not to worry about it. It's awesome our profession has a sub system in place, so let's try to make sure our sub is successful in our art room!

Tell me about the lessons you leave for your subs!  Thanks for reading!!


Sunday, August 23, 2015

The First Week: Welcome and Rules

 For the first week of art I always welcome them back and go over the rules. This year however it's welcome to the new ART ROOM! I will give students the opportunity to have a look around and play a game of "I Spy the ...." With the new room/school year I also updated my rules.

With that in mind I made some new posters. We have all seen the above poster or a variation of it as a method to rein in our students. So while I would desperately like to give credit where credit is due, I'm afraid I wouldn't know where to start. Just gonna say THANK YOU! AND I'm looking forward to trying this out in my art room this year!

I remade the sign on the left. It had been one big long blah, blah, blah, on a poster that was too small to read. I also remade the sign for having a safe art room. That was previously on a poster with photos and a lot of unnecessary info.

I always plan for a short activity for students on their first day of art. They will all get sketchbooks. K-2 will do a Summer Memories in a Jar, thank you Artsy Fartsy Art Room.

I have done sketchbooks for the last two years. The first year through a grant and last year through the generosity of my son's friend.  I did them with only my 4th and 5th graders. This year I have decided to do them with all the students. The question of course, is how to do this cheaply. Office Depot is a vender for our district, so the prices in the photos are if you walked into the store to buy these items. I know I paid less.  I really felt compelled to buy the copy paper with the holes, as it would really save on labor. 5000 sheets of paper with 3 holes apiece...........

 My little kinders and first graders will get 10 blank sheets in a folder to start with. That is one of the reasons, I think, I'm going to like the prong folders. We will be able to add to them.

By the way, a BIG SHOUT OUT to Mrs. Hall's daughter for putting ALL those sketchbooks for the little ones together! THANK YOU EMILY!!
 My second graders  will get 10 blank sheets and some lined paper for note taking. (The line paper was donated.) They will make their own books.
 For 3rd, 4th and 5th grade they will get the 10 blank sheets and some lined paper. In addition to that, they will get a page with sketchbook suggestions, and another page listing the Elements & Principles of Art that they will be required to fill in as we progress through the year.
They will also put their own books together. I have set the stuff up on the back tables and I will assign a helper from each table to facilitate. Then we will start to think about our first project.
                                  SELF-PORTRAITS!
We will look at different portraits, I added the Key Words and some questions from the back of these posters to the front to spark conversations with my students.

Yes, that is a portrait in the upper left hand corner of the photo below.  

 They will need to think about self-portraits in a very different way.

Below are 3 posters. The first one is from Box Artist and can be found here, the second poster is mine. I was inspired by Box Artist and the third poster is hanging up in the new art room of Kristen Trent Bourdier, who apparently I inspired! AND that is why I'm blogging to inform and INSPIRE!  Have an awesome 1st year Kristen! I'm SO happy for you!

What do all of you do the first week of art? I would love to hear from you!
Oh, not sure where I will be fitting in The Statue of Liberty from last week. Just found out the park is under construction. I may do the younger grades during Freedom Week in September.

Thanks for reading!!!