Pages

Saturday, March 10, 2018

Printing With Geometric Shapes

 Gotta love it when the Math Coach cleans out her stash! I snagged a big plastic bin of these wonderful foam shapes from my one day a week school last year.

Thought we could make some robot prints with them. I inspired them with this wonderful book check it out here on Amazon.

The first week we used Elmer's to glue the shapes down to a piece of cardboard. (Donated by one of our parents at the school.) I really enjoyed hearing the children ask for the shapes by their correct name.

 "Anyone have a hexagon or a trapezoid?"
 
The second week we were ready to print. I set up 2 tables with brayers and tempera paint on styrofoam trays.  Had the drying rack ready and waiting for artwork.
I demonstrated with my document camera what to do. Then went to the tables to help students print.
 They pulled 2 prints, one after rolling on paint and then a ghost print. Which they really loved!

I kind of let students do what they wanted the first day, but the colors got muddy in a hurry and I decided they needed to choose one color.  I pulled a few students at a time to do this. That meant the students back at their seats needed something to work on or chaos would be the word of the day.....

They had some worksheets in their art folders and some drawing prompts to keep them busy. Still a little hectic...... but this was kindergarten and 1st graders, not sure what I was thinking. However, the looks on their little faces made it worthwhile.  I will add that I constantly wonder what to do with students that miss the first or second week of a project. This time if they missed the first week that had a choice to make a robot with the shapes or print out one of my samples. Unfortunately if they missed the second week, then they didn't get to print because we had moved on. I feel really bad about this, but I'm one person and they just aren't independent enough to handle it on their own.


When the prints were dry I had students embellish their prints with markers. Some came out great and some got scribbled over.  

I loved doing this! It was really amazing for students to learn that we can print without that big thing attached to our computers...........

What's your favorite printing lesson??
BTW anyone interested in buying Gelli plates for printing can save 10%
by clicking on the Gelli Arts button on the right side of the blog.

Thanks for reading!


Sunday, February 11, 2018

Leather Craft

 Many, many, many years ago when my children were in elementary school before I was teaching art full time, I worked at a Day Camp. This was a pretty fancy camp because instead of being just an arts and crafts counselor, we had a speciality.  I was the leather craft counselor. Now before taking the job I knew nothing about leather crafts AND this was way before Google! So I learned by going to my local Tandy Leather Shop.  After doing that for a few summers, I invested in my own tools and did workshops as a visiting artist in schools and libraries.

 This hands on workshop, where children made a round leather key chain included lots of information on what leather was, where it came from AND what is made out of leather. I would show them part of a hide with the branding mark. I had lots of little items that I made out of leather and other skins that I shared with them.
Which included this cobra skin.
 I would explain how to use a mallet and stamping tools to decorate their key chain with. The leather used is made specifically for this purpose. To stamp designs you wet it with water. We use sponges and tried not to completely soak the leather. This is done to make the leather soft enough for stamping with the tools.
I would model how to hold the tool and use the mallet. I told them each tool was different and could be used to create patterns. When they were done I would dye it one color for them and add a beaded key chain.

When I started working as an art teacher full time I applied for grants to purchase leather to make key chains with my students. I also would buy a bag of scrap leather pieces for students to practice on. They needed that experience  because they would only get one "good" piece of leather.

Now in my quest to clean out both my house and my art room I realized I had some leather available to use with students. They all wouldn't make the same thing and I couldn't do it across all grade levels, but I would match the amount of what I had left to the number of students in a particular grade level. The last time I did this my 5th graders were in kindergarten.

 First grade made different shape pendants (which I see them wearing around school, awww).

 My second graders made the round key chains.

Fourth grade made bookmarks, All used Sharpies to color them in.

Now one of the reasons I'm sharing this is that I see requests on Facebook all the time about art teachers getting some money and asking for suggestions on what to buy. This is an absolutely wonderful way to offer something so very different for our students. And it addresses many of our standards: history, cultures, recycling, patterns, using different media, etc.

Many of the tools can be purchased on ebay cheaper than my original cost over 25 years ago.
All you need to start is a class set of mallets (I have 30) and maybe 3 dozen different tools. A leather hole punch if you plan on making key chains. Get some leather and sponges and you'll be ready to start! Seriously I think it can be done for under $200 NOT including the leather. There is a way to order leather in bulk as well as buying the hide and cutting it down to suit your purpose.

Thanks for Reading!


Anyone here do leather crafts with their students??


Sunday, January 28, 2018

Van Gogh Sunflowers


If you don't know about the Art of Ed website, you don't know what you are missing! They have wonderful lesson plans. One that I really like to do with my kindergarten and first graders is Van Gogh Sunflowers click here for your free download. While there check out what else they have!

I start off this lesson by showing my students a photo of Dali's Basket of Bread. We talk about how we can see the basket, however we can't feel the texture of the basket. Then I pass a wicker basket around for students to feel. We then continue the discussion of texture you can feel and texture you can see. I show students some examples that I made of visual texture on a board along with the actual texture next to it.

 I read them van Gogh and the Sunflowers. I also share a calendar of van Gogh's art where the photos are large enough to see the wonderful texture in his work.

Then I take them step by step through the directions. They glue the black paper to the bottom of the orange paper. I did change out the directions for the vase as I showed them how to fold the paper to make it symmetrical.

 I encouraged students to try ripping the paper, but not everyone was happy with that concept.


 We used a glue stick for most of the gluing and liquid glue for the tissue paper and seeds.

 And of course, children were instructed to sign their name along the middle of the vase, just like van Gogh.

Still loving the storyboard presentation. Have any of you tried teaching your lesson with a storyboard?


Monday, January 15, 2018

Museum Styled Centers


Happy 2018 everyone!
I completely powered-down during my 2 week winter break. I read, I watched Hallmark movies and I went to Nashville for a few cold days over New Year's Eve.

Besides the wonderful opportunity to visit my son and see his new house I LOVE to visit the Frist Center for the Visual Arts. Which happens to be about 5 minutes down the road from his new home.

They have this incredible interactive room for children of ALL ages. And I believe many of the activities in this area would make for some incredible centers in our art rooms.

 This is a good way to learn about Abstract Art. You start off by drawing the way something looks, then you draw a simplified version of the object and then draw it exaggerated.

 What a great way to learn about public art. Display a photo of your school and have students create a sculpture for the front of the building or perhaps somewhere in the playground.

 This looks very easy to set up and I have found some really great mirrors in my local dollar store.

 Unfortunately not everyone has the room for a life size mannequin, but an area with several small mannequins would work out just as well. (BTW those are my 3 of my grandchildren from a few years ago. They loved the place so much they wouldn't tell me they were hungry because they didn't want to leave.)
 Texture plates are pretty easy to find in the School Specialty catalog. Or pretty much any other school supply company.

 I have often managed to get foam shapes from an elementary math coach,  otherwise you can cut out your own. Or have a volunteer cut some for you. Use foam or laminated paper. Maybe put magnets on the back and get some metal baking sheets.

 Set out a basket of objects for students to draw and have them draw the subject and the background.

 An animation center could be set up with iPads that have animation apps. Not too experienced with that and would need to do research. Could be fun!

 Printmaking. While that set up is rather elaborate I'm sure something on a small scale could be done.

 Watercolor. This can be set up on a table to accommodate 4-8 students.

 These shapes reminded me of Matisse cut outs. I believe these were here to assemble. But I can see them being used to inspire Matisse style art.

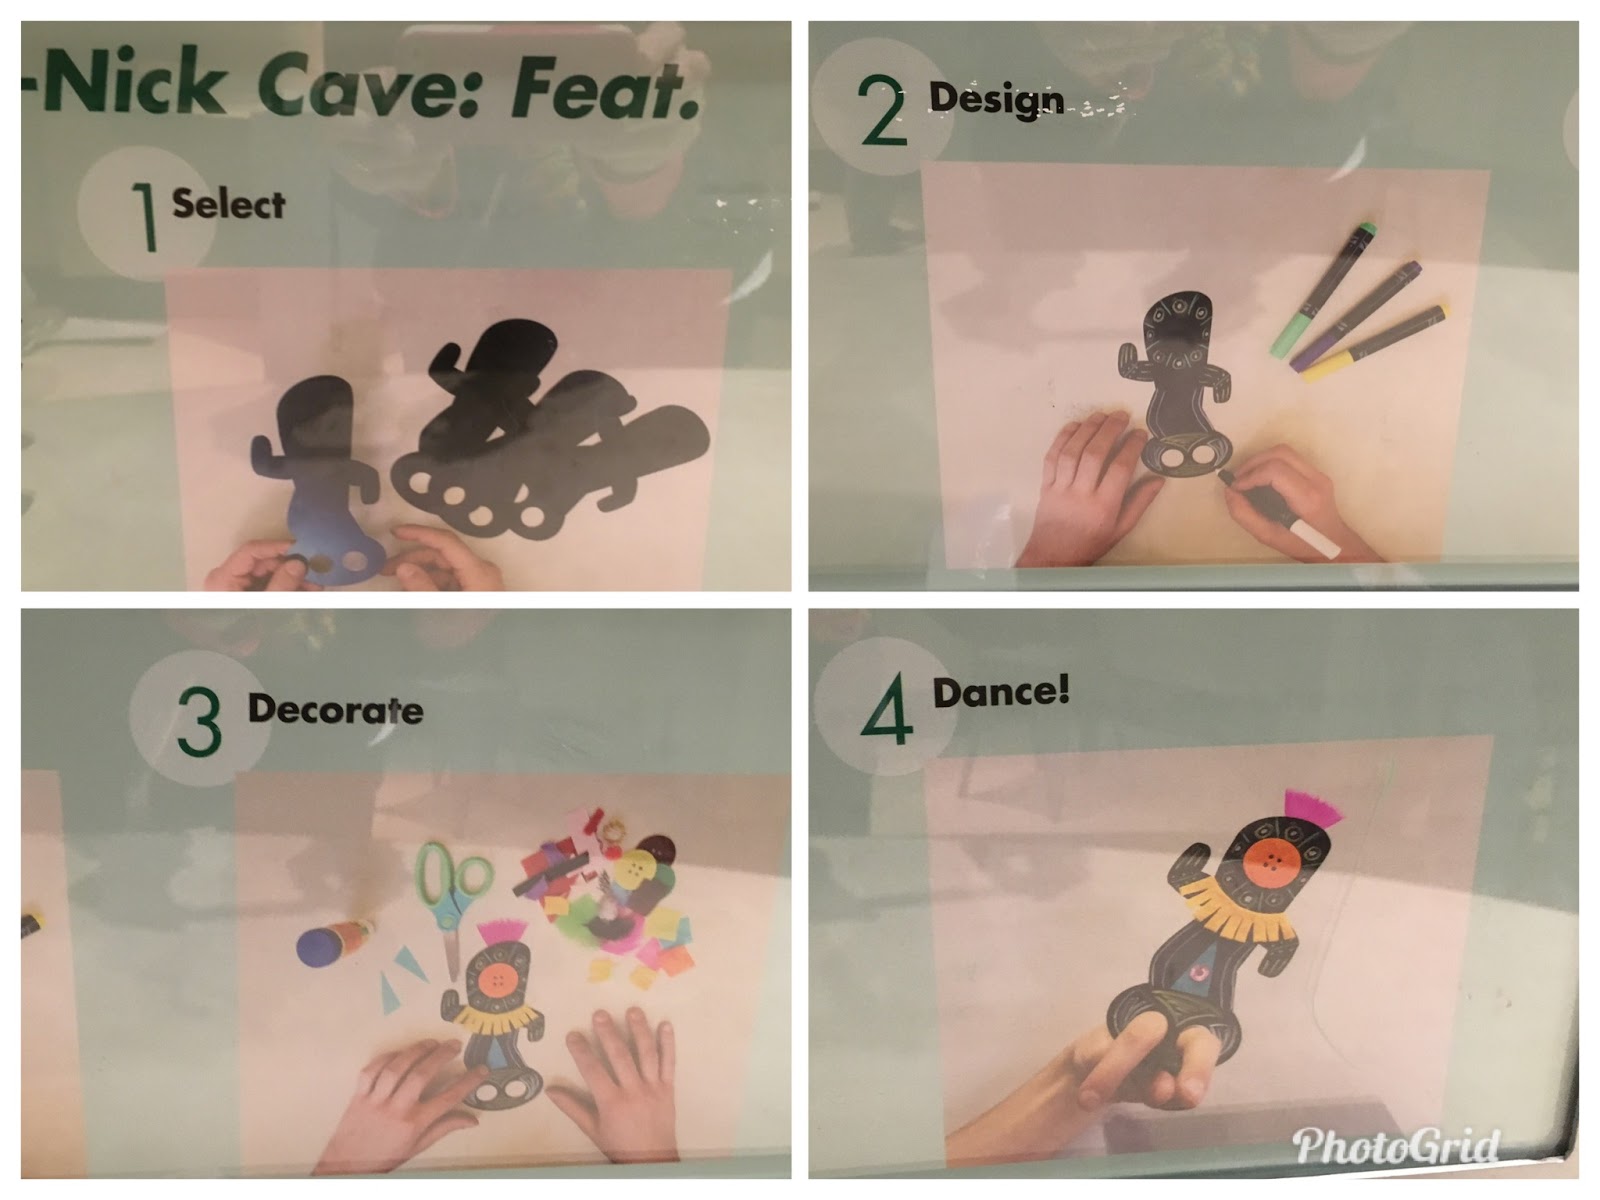
 They also had an area to explore the current Nick Cave exhibit. With a make and take. Which I took and I can't wait to do a lesson with my students about his sound suits!

I didn't include all the wonderful activities that were available as some spaces were hard to get to.

Turns out they will be redoing this area soon and and can't wait to get back to see it!

Centers in the art room is a great way to continue learning for those students who finish early. If you would like to see more ideas for centers visit my TPT site here for my free list of Art Centers for Extended Learning.  One of these days I might actually add to the list........ The Hallmark movies aren't helping my productivity..........

Hope you all have a wonderful new year! I still have lots of lessons to share and I'm pretty excited that I now have over 140,000 page views!!

Thanks for Reading!