Pages

Sunday, December 17, 2017

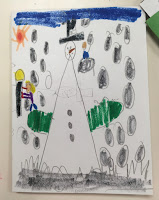
There Was A Cold Lady Who........


Pretty sure you have all read the story The Little Old Lady That Swallowed a Fly. Well apparently there is a whole series of books with a lady swallowing some pretty strange things. And then she gets up what she swallowed and creates something. In the book below the cold lady swallowed enough stuff to hiccup out a snowman. Amazon has it here if you're interested.


I am really getting into the storyboards, it's so helpful for a student that missed the lesson without going into a long explanation. Remember a picture IS worth a 1000 words......

 I demonstrated by using a tracer to draw a circle in the middle of the paper. Next a U shape above the circle,  a parallel line on each side of the circle.
 Add some mittens or gloves, lines for a long or short coat. Add a hat, legs or pants, boots or shoes and a scarf. Students in k-2nd grade had a visit from Santa recently and all the children received a hat, scarf and a set of gloves. I referenced his visit and had a discussion on all the wonderful patterns that were on their gift.
 
Originally I thought I would have students use just markers.

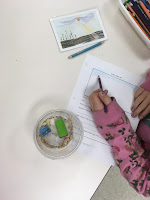
Then it occurred to me that students could practice using different media while filling in the Craftsmanship worksheet in their art folders.  I showed students the correct way to use markers, colored pencils and crayons. (A copy of the worksheet is on my resource page.)


Students were encouraged to make some of their own decisions. They could make a girl or a boy, change out hats, change out stomach contents. They were given 12" x 18" paper. This took 2 class sessions. Use smaller paper if you want them to complete it in one class.


There were so many wonderful works of art that came out of this lesson. I was so excited to see all the wonderful patterns and colors and hear them tell their own stories. The level of craftsmanship was up........ Overall a great time was had by all, including ME!

Happy Holidays and Thank you for Reading!


Sunday, December 10, 2017

Triangle Card Challenge


This is a really fun last minute holiday activity to do with your students. I may have been inspired by a Santa that I came across that was painted onto a triangle. I started to wonder what else could be made with a triangle?


Students were given triangle tracers that were 2" along the bottom and 4" on each side. They got white 6"x 9" drawing paper (paper should be folded in half, like a book) and a choice of markers and colored pencils.


An intro to the lesson was a discussion about the greeting card industry.  What kind of occasion would you give someone a card? Who designs that card? Did you know artists get paid to illustrate cards? Where upon one student wanted to know if he was getting paid for his card today.........


I showed students the different ideas I had for using the triangle to make a card. They could use my ideas but they needed to add to it. AND of course they could come up with something on their own.

 I can't believe I didn't think of an elf........

 Love the snow coming down in this one.


This student ended up adding some Christmas things to his dinosaur, but I got too busy to take another photo. It did make me think the triangle challenge could be just about anything and not just the winter holidays.

IMPORTANT UPDATE!!
Came across an address on Facebook to send to recovering soldiers at Walter Reed Medical Center and decided students could do one card they keep and one card for me to send out. They ended up writing some beautiful sentiments inside the cards. Turns out the address was incorrect. Contact your local V.A. to find out the procedure to send them cards. Thank You Tammy!!


I've got 2 weeks until break and the students are beyond excited for the upcoming holidays!
Let's hang tight, we can make it!

Thanks for Reading!


Sunday, December 3, 2017

Learn About Art


Here is a little something I do with either early finishers or students we are waiting for that are in Tier 3. Tier 3 is help for some of our students and takes place the first 20 minutes of Specials.

When I have everyone in class I will present the next lesson we are going to work on. But in the meantime..........

I modeled for students how to fill out the worksheet. Asking them the questions that are on the paper.
The worksheets can be used with art posters, art post cards or art calendars. Since it was the first time, I had the many postcards that I collected from my many museum trips spread out for my students.

 Students used colored pencils to color on the copy paper.


Now that they know what to do. They will find copies of the worksheet and more postcards in the draw at the front of the room under the white board.

The other drawers have photos of textures and drawing prompts that students may also use when they have time between projects.
Click here or go to my Resource page for a copy of this worksheet.

What do you do for early finishers?

Thanks for Reading!


Sunday, November 26, 2017

Positive and Negative Space

My state standards include teaching 3rd graders about Positive and Negative Space. I provided patterns and a storyboard for this lesson. And while many of you frown about "cookie cutter" lessons, you gotta start somewhere. You can also consider this a practice lesson and have students create they own pattern for Higher Order Thinking.

The first class I did this lesson with, I had a lot of confused students. That's what made me decide to have patterns available for them. (Positive/Negative pattern is available under the Resource page.) Next time I plan to photocopy patterns onto colored paper to make it even easier for them. We had a discussion on what positive and negative space is.

Students picked out a pattern and got a 12x41/2" black piece of construction paper, and a 9x12" piece of white drawing paper.

Students learned about making a continuous cut and were cautioned that there were no scraps with this project. (Except for the pattern pieces.)

They were instructed after cutting everything out to place down their cut pieces before gluing them.
Students who finished early were sent around to help others.

When children returned the following week to art they were instructed on how to use the white pencil on the black side and the black pencil on the white side to add details. Symmetry was reviewed and expected as part of their project. Black and white paper could also be used for details.


Students loved doing this and many of these wonderful projects will be out on display for the 3rd grade concert next month. The 4th and 5th graders were disappointed they weren't doing them.

Check out my blog post from the last time I did this lesson: Art on a Cart. Definitely art cart friendly!

Hope everyone enjoyed their Thanksgiving break! I've got some new lessons I'll be doing between now and the winter break. Can't wait to share them!

Thanks for Reading!