Pages

Sunday, April 26, 2015

Fun With Shapes!

Shape is one of the Elements of Art we all teach! And I gotta say I like to have fun and do different activities with my students.

But first, we have a discussion and define what makes a square a square, a circle a circle, a triangle a triangle and a rectangle a rectangle.
Next, I past out a photograph to each student to place on the appropriate shape. The photos are ones that I have taken, had laminated and put magnets onto. For me, squares apparently were the hardest shape to find!


 We have a discussion on how everything has a shape. And that we really need to look at things to figure what shape it is and how that helps us in art. I have recently added 3D shapes and must say I'm amazed at how many of the little ones know about spheres, cylinders, pyramids and cubes!


Then, I past out shapes to students and have them match it up with things in the art room. This is the fun part as everyone is walking around the room finding shapes! Students start making connections.  This wonderful introduction into geometric shapes usually will take up one class session. 
So.......

When students return the following week, we do a quick review and I read either the book at the top of this post or this book-
Then a quick demonstration on how we can use shapes to create art.
Look! What can be done with a rectangle? Or a square? What can you make?
Students then choose a shape to work with to make art.

I use the sheet below and photocopy it onto colored copy paper. I separate the shapes and have children  pick which shape they wish to focus on.
In the past, I have had students create their own shape book. Which includes more shapes and takes several classes to complete. However, I found that if there are too many sessions for one project, there are always kids who miss some lessons, or just move in, and it's just hard for them to catch up.
Keep it simple the voice in my head tells me!

I feel the need to apologize for the lack of student work in this post.  The last time I did this lesson, writing a blog was the furthest thing from my mind! So, I didn't obsess on taking photos ALL THE TIME, like I do NOW! Hope this will still inspire you all!

I can't believe the end of the school year is in sight. I have been packing my little heart out as I will be returning to my newly renovated school in August! More on that another time!

Thanks for reading!! 
I would love to know the fun things you do to teach shapes to your students!

Sunday, April 19, 2015

Primarily Art with Mrs. Depp: 2 D and 3 D Self Portraits

Primarily Art with Mrs. Depp: 2 D and 3 D Self Portraits:  I'm pretty sure all of us art teachers have had our students doing a self portrait at some point in elementary school. I actually rea...

2 D and 3 D Self Portraits

 I'm pretty sure all of us art teachers have had our students doing a self portrait at some point in elementary school. I actually read of one teacher who has her students do one every year. I think that is a great idea! As it turns out, these self portraits are from 2011/12 and were part of the first exhibit I had displayed at The Leepa-Rattner Museum of Art.
Had students do some really cute ones last year with parrots on their shoulders for the pirate thing we have going on at school-but didn't take any photos........next time.


The wonderful portraits above were made by my kindergarten through to 3rd grade students. I had 2 different oval tracers for them to use. We discussed how much of ourselves should be in the portrait. Just the head, head and torso, what else could we include as part of the portrait. Are we standing in front of examples of our art? Are we outside? A favorite place?

The lesson always starts out with talking about the shape of our head. Then, how our EYES are half way between the top of our head and our chin.  Our NOSE is half way between our eyes and our chin AND our MOUTH is half way between our nose and our chin. EARS are located on the side of our head between our eyes and our nose. I touch my face as I explain this and encourage them to locate all of this on their faces. And NO EYES on our foreheads........ please!

I had the students paint their portraits and I really loved how they came out.

My 4th and 5th graders did 3 D portraits. I had found out about this project at one of my district planning days where we do a meet and share.
Very simple: use a 12"x18" piece of construction paper folded into thirds for the head. Demonstrate different ways for the students to manipulate the paper- tearing, curling, fringing, folding for the details AND before you know it you have these really cool 3 D portraits!

 It is really fun when you have "Crazy Hat Day" during the week you teach this!!
Yes, I really have a flamingo hat!

As I mentioned, last week was hectic! I now have a new grand daughter, that I had the opportunity to see as she was being born. A big THANK YOU to my son-in-law for giving me this incredible memory.

Thanks for reading! I would love to know about the self portraits you do with your students!!


Primarily Art with Mrs. Depp: Earth Day, Clowns and Toilet Paper Rolls, Oh My!

Primarily Art with Mrs. Depp: Earth Day, Clowns and Toilet Paper Rolls, Oh My!:   I am pretty sure that I am NOT the only art teacher, who thinks about how to use empty toilet paper rolls. ...

Sunday, April 12, 2015

Earth Day, Clowns and Toilet Paper Rolls, Oh My!


I am pretty sure that I am NOT the only art teacher, who thinks about how to use empty toilet paper rolls. Granted, maybe the only one who thinks about it while falling asleep...........
Probably the ONLY one, who had to come up with a NICE way to tell the cleaning lady NOT to throw them out. (Don't judge me!)

        Anyway- got some STUFF I want to use up and Earth Day is this month.... Have no idea why I decided to make a clown, except that I think making the hands and feet large would be easier for my students. And clown parts tend to be exaggerated.


Decided to gather up a bunch of stuff this morning to create a sample project for my little ones  to make in recognition of Earth Day. Need to seriously use the empty toilet paper rolls!

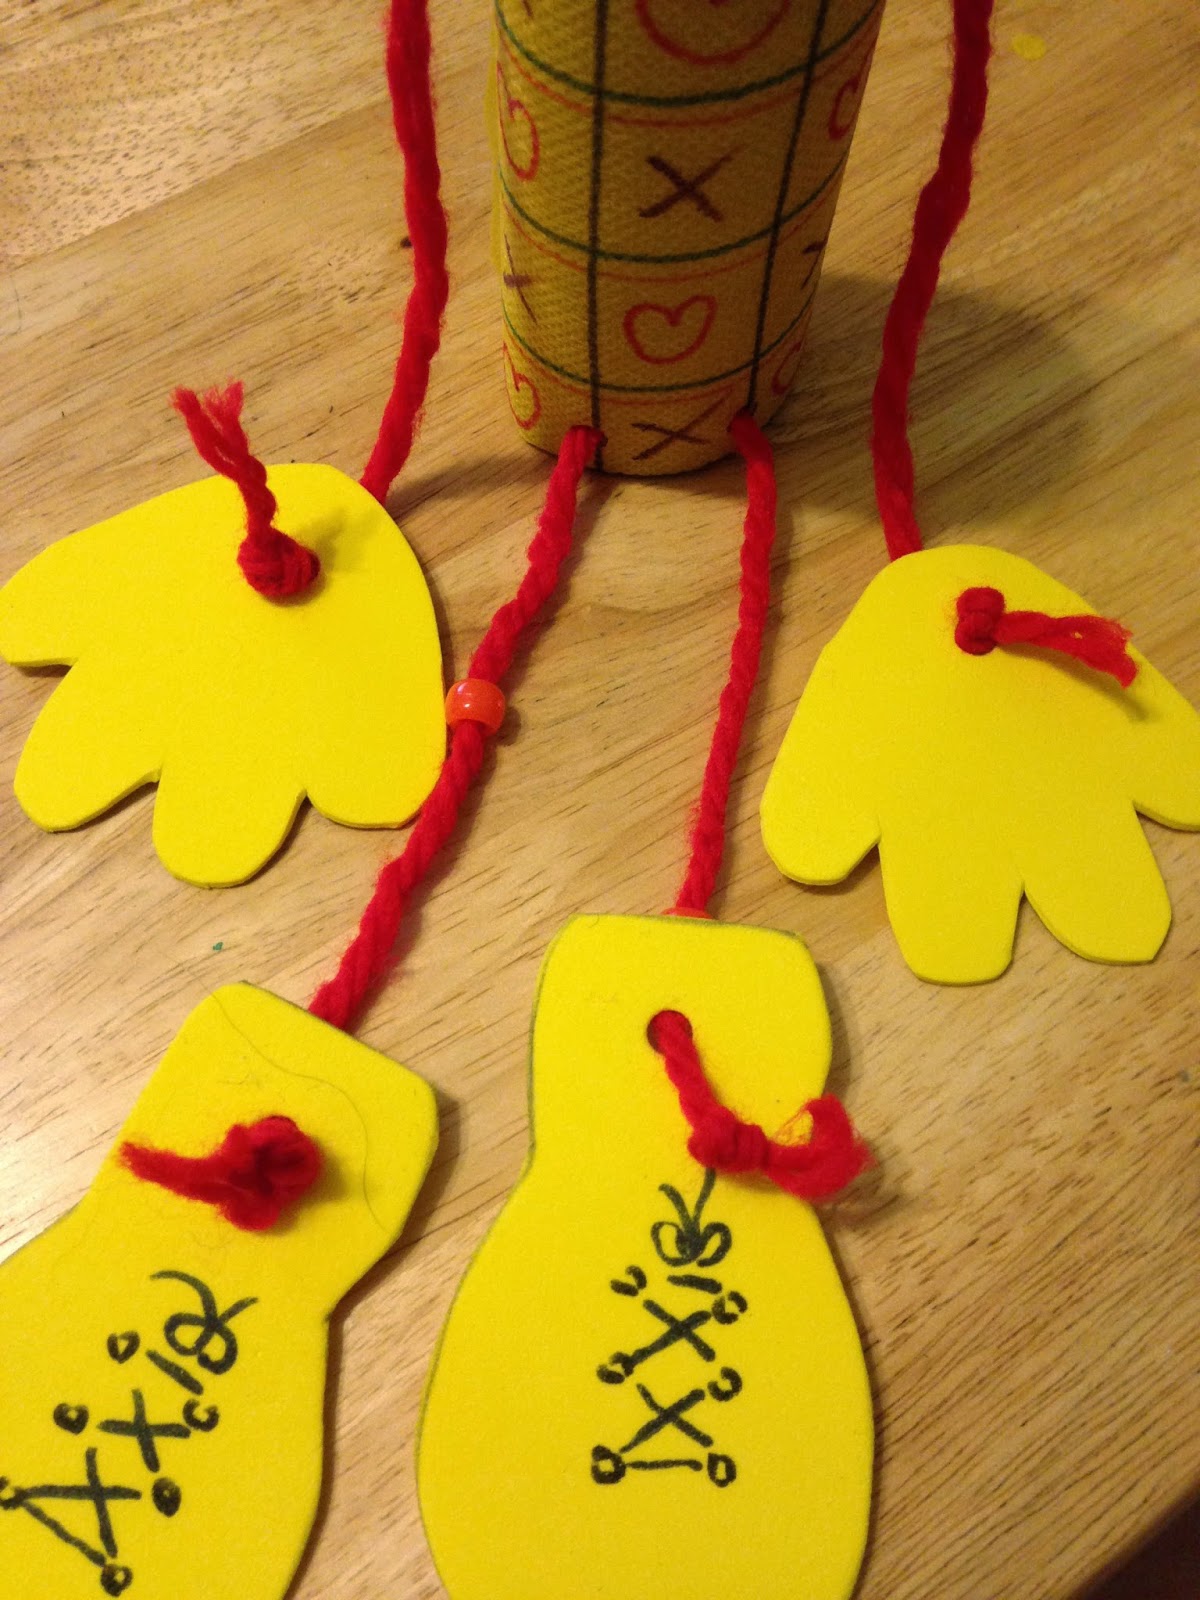
 This project will cost next to nothing to make. I have a lot of samples of Smart-fab, again DON"T judge me! Lots of leftover yellow fun foam from making bananas for community theater. I have a box of yarn along with many other wonderful craft items that can be used by my students for  embellishment.

After setting out all the goodies I planned to use. I drew a few body parts for the clown to create tracers. Also, made a tracer for the collar.  I cut that tracer in half so that I can teach/reenforce folding for symmetry and ease of cutting.
   
Traced body parts onto the foam, collar onto Smart-fab.

Added hair and hat shape to foam. Colored everything with Sharpies, not happy that they smudged a little. Will need to caution kids about that. Body is a 8"x 6" piece of Smart-fab, which by the way, did NOT bleed through to the table when colored!
Cut everything out to assemble it all.
Wrapped body around the toilet paper roll and tucked it in. May end up stapling it later.
Punched the holes for the arms and legs. (Actually tested out all the materials to make sure it would be easy enough for children to do.)

Used a 15" piece of yarn through each pair of holes. Put hands and feet on the yarn and double knotted it. Won't be using the pony beads as it was too difficult for me-which translates as too difficult for students.
Will be using the above photos and teaching students to knot, they will need to know this for future projects.  Collar goes on! Head goes in the top! Check out my clown!!

I plan to introduce this lesson with paintings of clowns-will use happy NOT scary images. I will be looking for a storybook with clowns and/or a circus theme. Suggestions welcomed!

I'm planning that this will take 2-3 class sessions. I won't be starting this until the week after next. Because Friday is mask day for the 5th graders-so I will have a sub.

I will also be out on Tuesday and Wednesday BECAUSE my daughter is blessing me with another grand baby! This will be #5. My son has 3 and now my daughter will have 2!

Will post photos of my student's clowns sometime in the future along with other photos of finished projects that weren't ready when I blogged about them.

Again, THANKS for reading this!!