Pages

Sunday, August 27, 2017

Back to School!

Just finished up my second week back with students, the start of my 17th year of teaching full time.  Many teachers on Facebook have posted a recap of their teaching career- I decided there were too many schools to count if I include the split schools, part time assignments and subjects other then art!

So what did I do to start off the new school year, you ask?
I did this assessment with my kindergarten students. It took 2 class sessions. I found this assessment along with directions on the Art of Ed website. I wanted to link the resource, but couldn't find it. The directions, as I remember them, are given verbally and students can complete the assessment in one class. Update! I found the link!!! Click HERE!
I stretched it out over 2 class sessions because- I don't want to feel rushed and I also want some time for a "Welcome to art, along with the rules" spiel.  On their first day of Art I read them the book Art Today by Jane Wolfgang.
After hearing the story we talked about the shapes and how we can color them in to create a person.


The next class I read Too Much Glue by Jason Lefebvre. I modeled how to use a glue stick (I'll use liquid glue, when I'm feeling brave....) and how to safely use a scissor. Then I walk around the room and see how the little ones are doing with their assignment. Many of them need help learning how to hold the scissor and cutting with it.

Some are absolutely amazing .......

And some take quite a creative spin......

For 1st and 2nd I decided to read the book Pete the Cat and His Magic Sunglasses by Kimberly & James Dean. The glasses were a free download from Art is Basic at Teachers pay Teachers. Instead of tying it into what students did over the summer, I tied it into looking forward to a new school year.


3rd, 4th and 5th learned about 9/11 and they did art for the posters I send over to the Park to commemorate the event. Click here for a post from 2 years ago, and here for last year's post.


I did a step by step sheet for students who wished to earn how to draw their own hand. I found those directions here.
I will have these displayed at the park on 9/11- Update: Actually due to Hurricane Irma, there will be no display as the event has been cancelled.

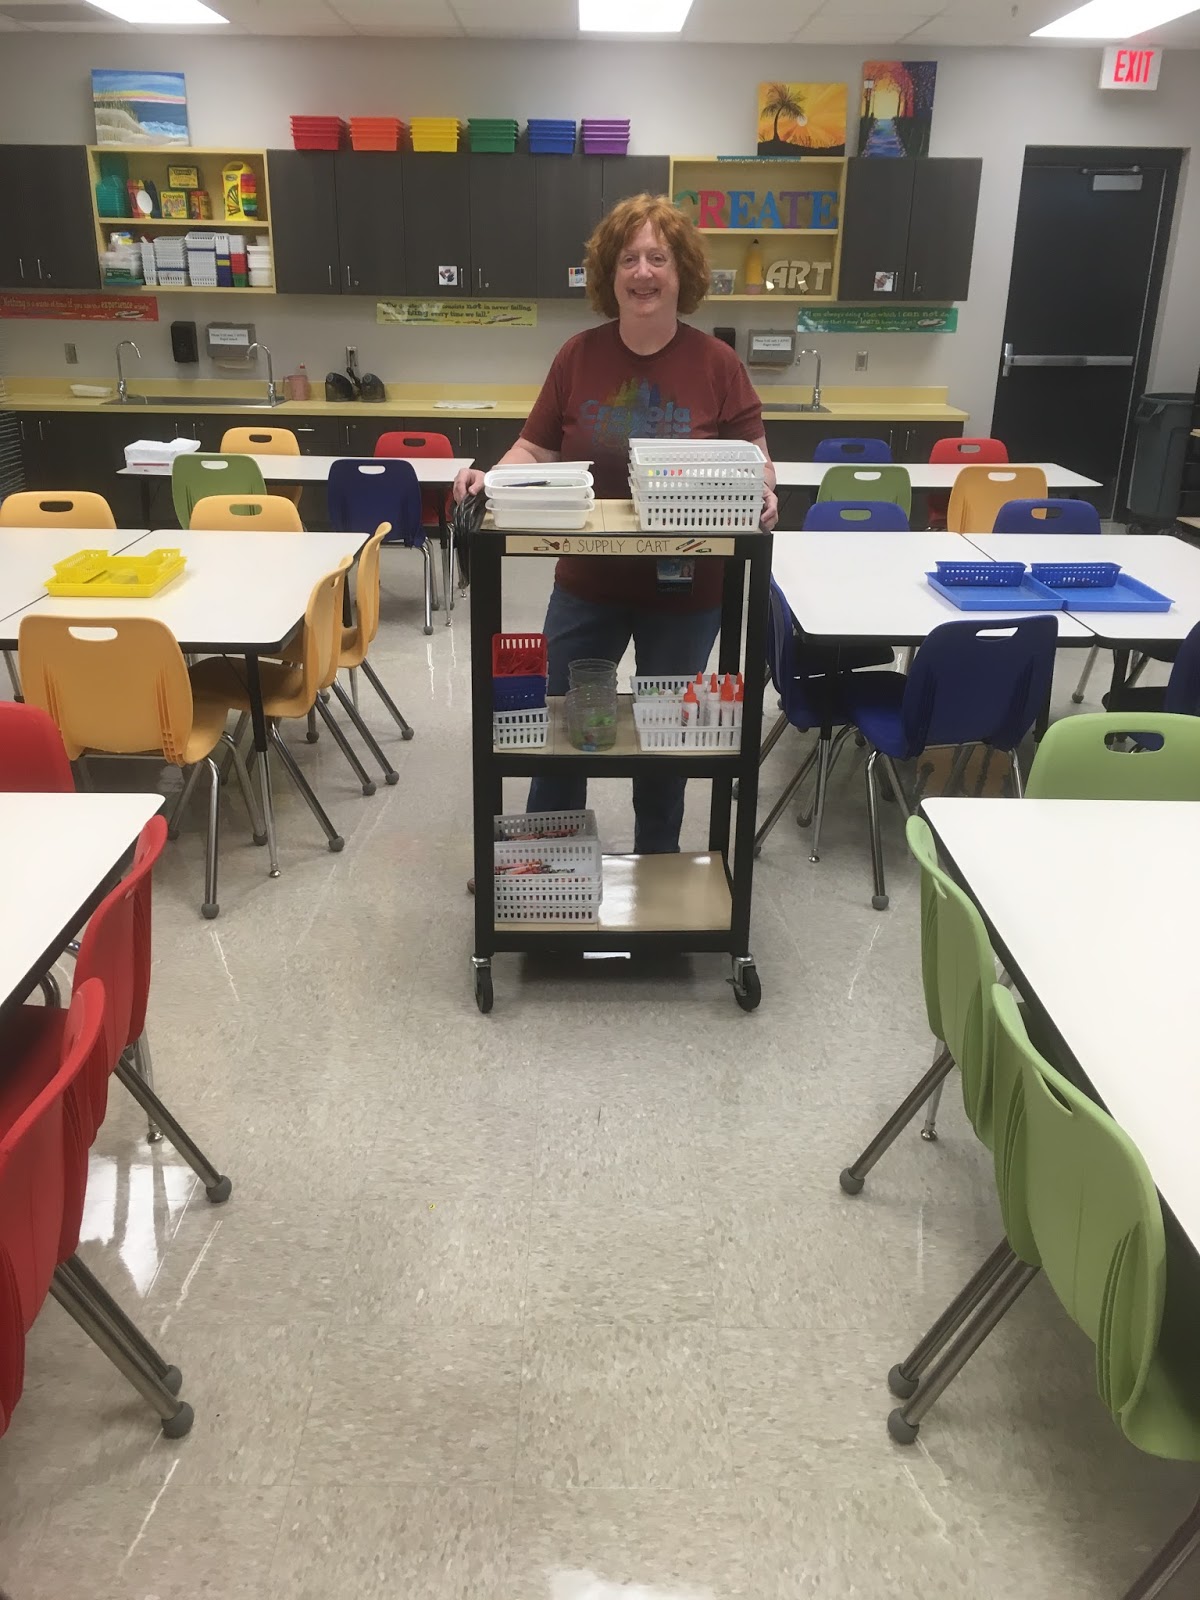
I don't have a lot of counter space to hold the supplies that I switch out daily for the different grades that I see..... So I use a cart. I decided to make the cart student friendly and label where the supplies belong so that I have help setting up for the next class. It is really easy to wheel between the tables and switch everything out quickly, especially with the students that love to help!


All of last school year as I would head to the Fine Arts building I would look at this plain white septic thingy and think it needed some Lego eyes..... Only took admin 2 days to notice AND there's another one around the corner that I will do next..... Something to make us all smile!
(I used vinyl scraps from my friend's who has a Cricut machine)

I hope everyone has a GREAT new school year filled with creativity!
Thanks for Reading!


Sunday, August 6, 2017

Henna Tattoos

Been super busy the last couple of weeks getting my head wrapped around the concept of returning to school! And while I have managed to accomplish many of my goals for the summer, I didn't do everything....... I did DO a lot of reading, relaxing and sleeping. I also succeeded in completing over 300 levels of Cookie Jam. Redecorated a few areas around the house and went on a mini retreat with the FAEA to Ocala.
Part of the retreat was at the Appleton Museum of Art in Ocala, Florida. Which was pretty exciting for me, as I've never been there. It's a beautiful place. We got to explore the museum for a bit and had 2 workshops. One of which was Henna Hands given by Griselle Gonzalez.

 The photo on the left shows the stages of Henna. The Henna ink comes in cones, the point of the cone has the opening in which the ink comes out. It is very paste like and is raised up on the skin. It needs a good 30 minutes to dry and 4 hours later you can crumble off the dry ink. The design will darken over the next 12 hours and stay on for little while. You can still see some of my design even though it is 2 weeks later!

 I really didn't know much about the history of using Henna for tattoos. I was surprised to see how many cultures use a variation of this art. I have found different lessons online to do with students and I'm looking forward to sharing this with them. Will do a blog on that in the future!

Above is our instructor Griselle Gonzalez, the power point she gave was excellent. The other photo is the box the the Henna Cones came in. Henna ink can be found online. Try Etsy or Amazon.
 
This is me with my buddy, Glenda Lubiner (she writes the Tried & True Tips for Art Teachers in Arts & Activities Magazine). After trying out the ink on Glenda I got the nerve up to try it on my arm.
 

Check out all the wonderful designs on some of the other art teachers in the workshop!

The retreat was a nice way to spend the weekend. I met new people, which is always fun & caught up with my buddy Glenda.  All in all a great time!

In addition to preparing to return to work, I will be presenting at the FAEA conference in October. Registration starts tomorrow August 7. I will be doing the workshop Start with a Story, sharing how I use literature to inspire students and a presentation titled Grant-tastic about how I applied and received grant money for my program.

Turns out I'm also on the ballot and might be the next Elementary Division Directer. Voting on that starts tomorrow and will be open until 3 pm on October 20th. Check it out!

Thanks for Reading! And let's all enjoy the new school year!


Friday, July 14, 2017

Interplanet Janet, a Summer Project


Totally have this song stuck in my head from Schoolhouse Rock about Interplanet Janet who is a galaxy girl. Click here for a you tube video of the song, caution as it might get stuck in your head too.

The reason this song is stuck in my head is because I was asked to create a doll of Interplanet Janet for a production of the musical to be performed at my local community theater. The president, aka my dear friend Kathy, who is an awesome person, asked me if I would paint this picture on some white fabric for her to make a doll.

As I thought about this I decided painting it would make it stiff and hard to sew. Meanwhile I sketched it out on a large sheet of paper that had been used as package stuffing. (Yes, I save weird stuff.)

Also, decided it should be made on unbleached muslin and instead of painting it I could baste down Smart Fab for color. (Yes, I totally took over the project.) I traced my pattern onto the fabric, (fabric was a double layer to have and front and a back) then I drew another line around, about 1/2" away to create seam allowance for sewing it together.


Then I used different parts of the pattern to make the pieces for the hair and body parts out the Smart Fab. With the Smart Fab you don't need to worry about frayed edges, kind of like felt but thinner.


I used a Sharpie for the eyes, nose, smile and some lines on the bottom shape.
After I pinned it right sides together, I realized I had no idea where exactly I should be sewing it. Yes, I had added seam allowance, but I wanted to make sure I was sewing it in the right place. So I just traced the pattern again so I would know where to sew it.

To add the flames at the bottom I sewed them first to a strip of Smart Fab so they would all stay together and be easier to sew.

Next it was time to turn it right side out and stuff it!

I had planned to stuff it through the bottom but the neck area was just too tight. I had not basted the hair down on the back of the doll so that the performer could put her hand under the hair to hold it up. So I went under the hair and slit a hole to stuff the doll through the top. Now I had 2 areas in which to stuff it from.

Because I didn't want the head to flop over and the neck is so thin I cut a toilet paper roll and placed it inside the the neck area. The roll was tightened up first and able to expand inside the doll.


When it was finished I couldn't wait to drop it off at the theater. And as luck would have it, it was perfect timing, as the troupe would be doing that song next! I was invited to stay and watch! And what a fabulous performance! And the young lady holding the doll did the number on ROLLER SKATES!

And that is how the song got stuck in my head!

Can't wait to attend the performance next month with my husband & grandsons.

Thanks for Reading!